Replacement of seals and spacers kit Clack Valve WS1EE.
For this tutorial we used a WS1EE softener valve with meter, but this article can also be used as a guide if you need to change the seals or spacers of WS2 and WS3 valves, as the components of all clack valves are similar.
In the following video you can see how to change the seal and spacer kit on a Clack WS1EE valve.
In this short tutorial we explain how to change the seal and spacer kit of a WS1EE valve.
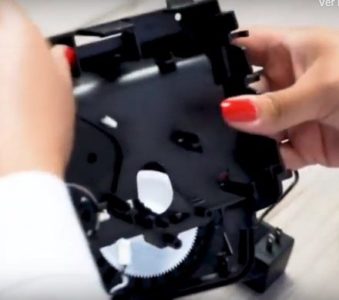
Remove the valve cover:
Let’s start by removing the valve cover, hold the cover by the side ends and pull it slightly outward to release it from the latches and remove it.


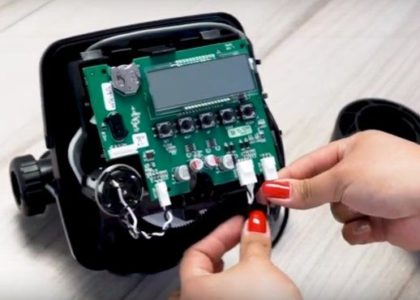
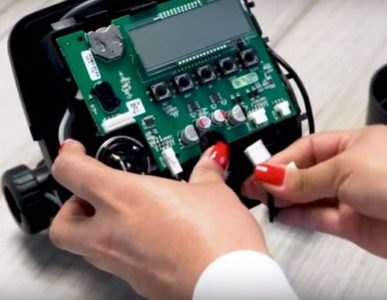
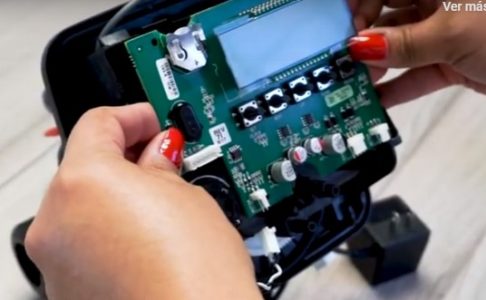
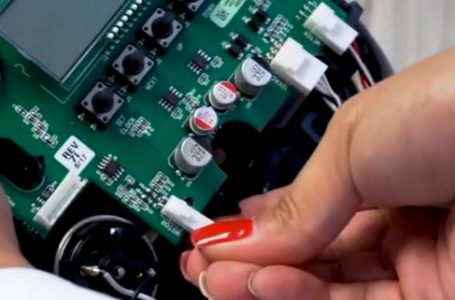
2. Disconnect the pins:
Disconnect the 3 pins that are connected to the board, in this case the meter pins are connected (because this is a metered WS1EE valve), the power supply and the motor.
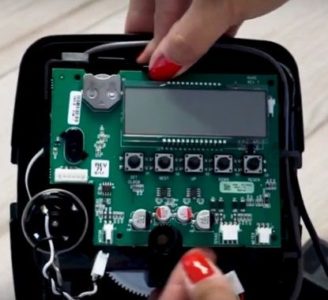
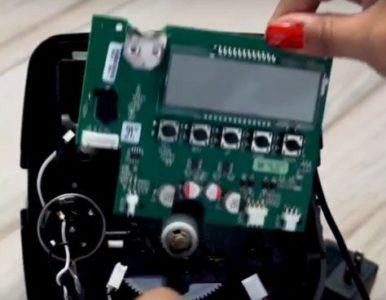
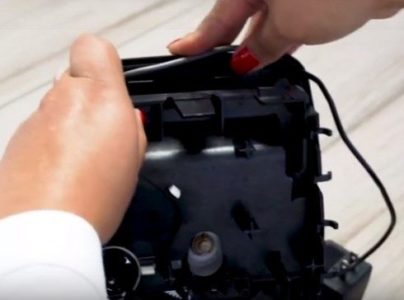
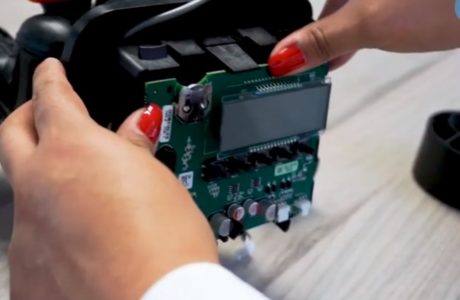
3. Remove the PCB:
Press the latch on the top of the PCB and pull the board up a little to remove it, be very careful because it has very sensitive parts.
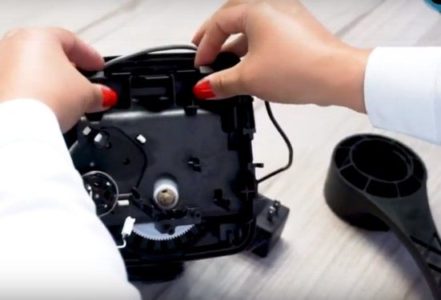
4. Remove the PCB holder:
Pull out or remove the valve support by pressing the latches on the top.

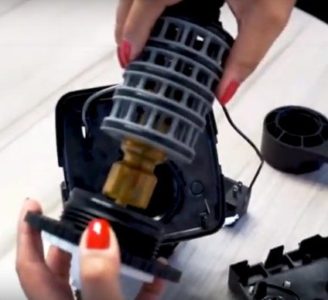
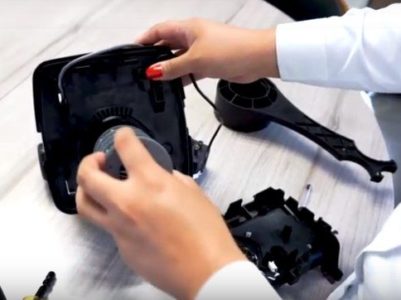
5. Remove the piston and seal kit:
- Although no special tools are required for the assembly of the Clack valves, an official Clack wrench (Code: V3193-01) can be purchased to ease the assembly and disassembly of the valves.
- To remove the piston section and the spacers, loosen the central gear, you can use the clack wrench (Code: V3193-01) or any other tool to loosen it, taking extra care not to damage the gear.

Remove the piston, the seal and spacer assembly, being extremely careful not to damage them.
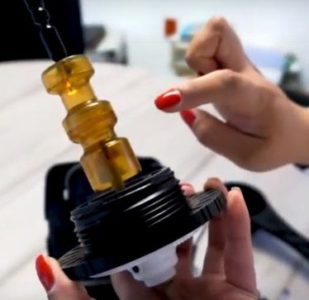
Nota:
At this point, if you are checking the piston or seals for leaks in the valve operation, it is important to check that the piston does not have any scratches, because if they exist, this may be the cause of the leak and it may be necessary to change the piston.
In this case our piston is in good condition, it does not have any scratches, so we proceed to the next step.
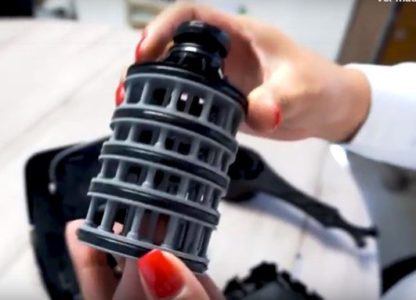
6. Replace the seal kit:
This is what the seal kit looks like, you simply replace the part and put it back in as far as it goes, there’s no need to over tighten.
Nota:
Usually the seal and spacer assembly is supplied with a special lubricant pre-applied, in case the spacer gaskets are a little dry you can apply a silicone lubricant to prevent them from drying out or breaking.
7. Put the piston back in place:
Carefully insert the piston so as not to damage it, re-thread and tighten with the wrench until you feel it is fully tightened. If necessary you can apply a little lubricant to the piston.

8. Put the base of the valve PCB back in place:
Place the valve support, the valve has guides where this support fits, press the latches and make sure that the support fits correctly.
9. Re-insert the PCB:
Now place the PCB by pressing lightly until it is perfectly positioned, taking care not to touch the display or any other device that may be damaged.
10. Connect power supply cables:
Connect the power supply, meter and motor pins.

11. Attach the valve cover:
Attach the valve cover considering that it fits completely into the 2 locks on the side.

12. Place the valve on your filter or softener.:
Attach the valve to your filter or softener equipment and operate your valve regularly.
That’s it! We have changed the seals and spacers kit of our Clack WS1EE valve succesfully. The same procedure would apply if we wanted to change the piston or if we only wanted to change the PCB of the valve.